Power of Curves in Adobe Photoshop Lightroom || How to manipulate Curves to get different ranges of Contrasts & Tones in your photographs
Although lot of websites have explained Curves very well, but this blog is more about the way I interpret various things about Photographs and Image Processing tools like Photoshop and Lightroom. Today we shall look at the ways to interpret Curves for a Photographs and how to use them to get appropriate Tonal Values in a Photograph.
Tone-curve is one of the single powerful tool in Lightroom or Photoshop, with lot of flexibility to experiment with different tones of a photograph.Tone curve is used to brighten or darken tones in Photographs. Different folks have different ways of dealing with Curves and other Basic Controls like Exposure, Brightness, Fill Light and Recovery etc.
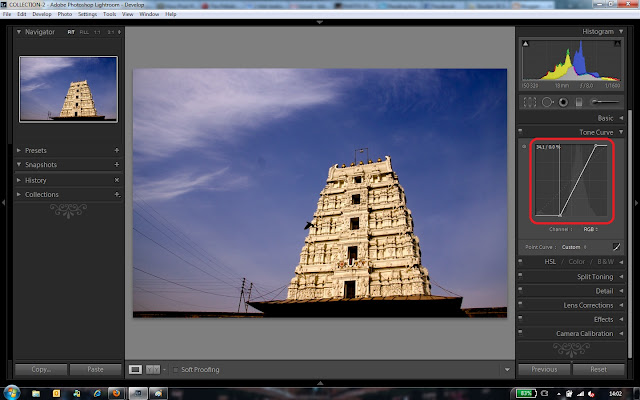
Now please have a look at Curves in image below. It shows a straight diagonal line as shown below. This is how Curve looks like for an unedited photograph and in Lightroom grey colored histogram is shown in this square region of Curves. Here are few things to note before we start discussing about the way Curves work and are manipulated...
1. On Horizontal side, scale indicates brightness level scaling from pure Black to Pure White with middle part indicating midtones (Greys). Please note that here we are not talking about colors and only talking in terms of brightness level.
2. Vertical Axis also indicate the Brightness level ranging from Black in the bottom and White on top.

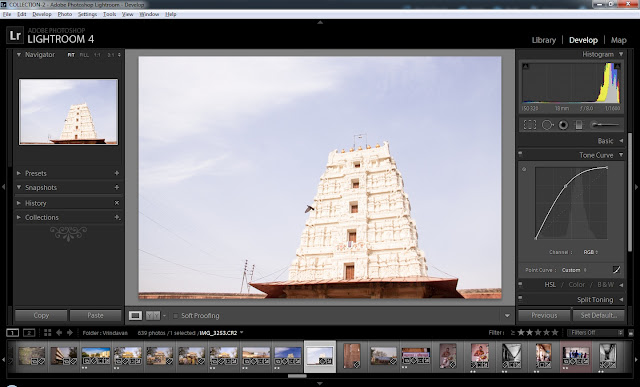
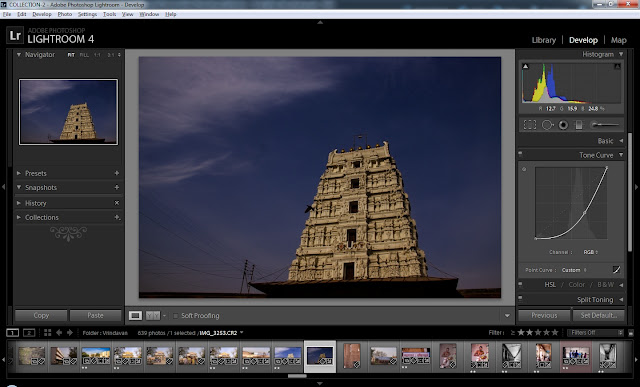
3. From above two, now we can conclude that brightness level of the image will increase if we move this line upwards. Just have a look at below two images and compare with first one, you will get an idea.
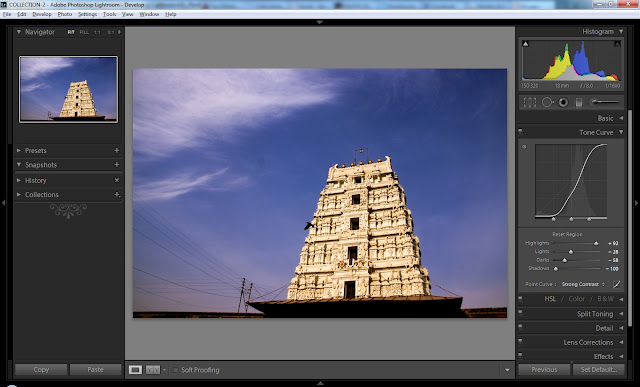
4. Apart from above two scenarios there can be other things we can achieve through manipulation of Curves in Adobe Photoshop Lightroom. We can add or subtract contrast with the Tone Curve. Adding contrast is a mix of brightening the bright tones of our image and darkening the dark tones. Here is a curve that does just that – it is called an S curve :-
S-Curve can have different shapes looking like S and that defines the intensity of Contrast in a photograph.
5. As opposite to point-4, we can also decrease contrast by making bright pixels less bright and dark pixel less bright, which effectively means opposite S. Please see image below and see the impact on original photograph. Although this is rare to see -
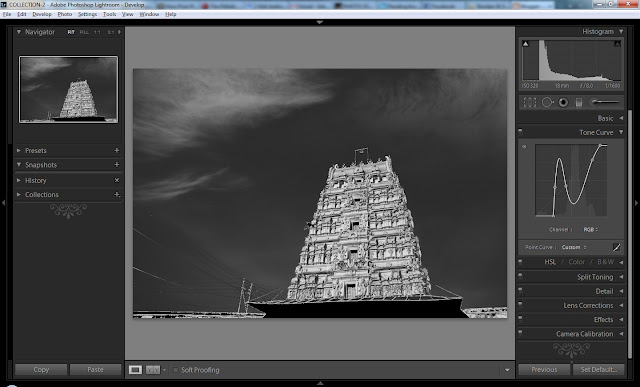
6. The Curve shown below is indicating a curve where dark tones are made pure black and Bright tones are made pure white. Please have a look at curve below and it's result in the photograph on left.
For now, it's enough information about Curves to digest and we shall see more about Curves in consecutive posts on this Blog. Below are just few pointers to understand experiments we can do with Curves.
Lightroom is my primary Photo Processing software and that's why you see all above screenshots from Adobe Photoshop Lightroom. Curves are usually same in most of the softwares. Personally I always recommend Laura Shoe's website for Lightroom and here is how Laura talks about Curves in Lightroom - http://laurashoe.com/2011/09/01/what-is-the-tone-curve-in-lightroom-and-camera-raw-and-photoshop/





.jpg)
Comments