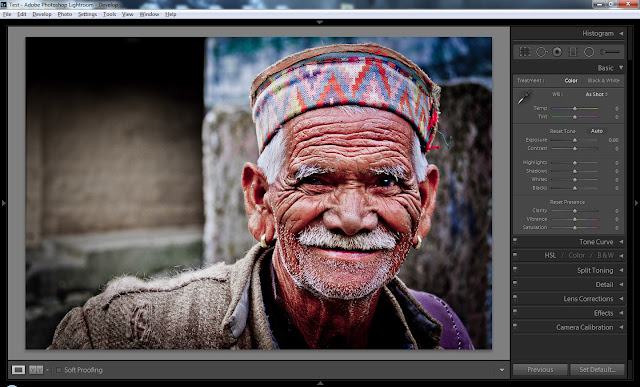
Radial Filter in LR5 - First attempt to process a photograph using new feature of Adobe Photoshop Lightroom 5.0 Beta

Adobe launched 'Adobe Photoshop Lightroom 5.0 Beta' on 15th April 2013 and it's freely available for everyone at - http://labs.adobe.com/technologies/lightroom5/ . After installation on Windows7 machine, I noticed Radial Filter on top part of Develop Module in 5th version of Lightroom. Let's check out what exactly this tool does and how it makes difference to photographs.After opening above photograph in Lightroom 5.0, select Radial Filter tool on right side of gradient tool. Now select face with Radial filter and give appropriate shape to the selection. Around this circle, there are some white dots which help in resizing this selection. On the right, there are different sliders through which we can control exposure, contrast etc. Whatever we change, that only impacts outside the selected region. Just have a look at image below and you will get a sense. In this photograph blacks have been enhanced along with reducing clarity. I just spent 3-4 minutes on this photograph and this feature can be quite interesting.But I wish that we could have option to select multiple areas in a photograph.

Adobe launched 'Adobe Photoshop Lightroom 5.0 Beta' on 15th April 2013 and it's freely available for everyone at - http://labs.adobe.com/technologies/lightroom5/ . After installation on Windows7 machine, I noticed Radial Filter on top part of Develop Module in 5th version of Lightroom. Let's check out what exactly this tool does and how it makes difference to photographs.


Adobe launched 'Adobe Photoshop Lightroom 5.0 Beta' on 15th April 2013 and it's freely available for everyone at - http://labs.adobe.com/technologies/lightroom5/ . After installation on Windows7 machine, I noticed Radial Filter on top part of Develop Module in 5th version of Lightroom. Let's check out what exactly this tool does and how it makes difference to photographs.After opening above photograph in Lightroom 5.0, select Radial Filter tool on right side of gradient tool. Now select face with Radial filter and give appropriate shape to the selection. Around this circle, there are some white dots which help in resizing this selection. On the right, there are different sliders through which we can control exposure, contrast etc. Whatever we change, that only impacts outside the selected region. Just have a look at image below and you will get a sense. In this photograph blacks have been enhanced along with reducing clarity. I just spent 3-4 minutes on this photograph and this feature can be quite interesting.But I wish that we could have option to select multiple areas in a photograph.

After opening above photograph in Lightroom 5.0, select Radial Filter tool on right side of gradient tool. 

Adobe launched 'Adobe Photoshop Lightroom 5.0 Beta' on 15th April 2013 and it's freely available for everyone at - http://labs.adobe.com/technologies/lightroom5/ . After installation on Windows7 machine, I noticed Radial Filter on top part of Develop Module in 5th version of Lightroom. Let's check out what exactly this tool does and how it makes difference to photographs.After opening above photograph in Lightroom 5.0, select Radial Filter tool on right side of gradient tool. Now select face with Radial filter and give appropriate shape to the selection. Around this circle, there are some white dots which help in resizing this selection. On the right, there are different sliders through which we can control exposure, contrast etc. Whatever we change, that only impacts outside the selected region. Just have a look at image below and you will get a sense. In this photograph blacks have been enhanced along with reducing clarity. I just spent 3-4 minutes on this photograph and this feature can be quite interesting.But I wish that we could have option to select multiple areas in a photograph.

Now select face with Radial filter and give appropriate shape to the selection. Around this circle, there are some white dots which help in resizing this selection. On the right, there are different sliders through which we can control exposure, contrast etc. Whatever we change, that only impacts outside the selected region. Just have a look at image below and you will get a sense. In this photograph blacks have been enhanced along with reducing clarity. I just spent 3-4 minutes on this photograph and this feature can be quite interesting.

But I wish that we could have option to select multiple areas in a photograph. 

Trending Post Today !

How to reach Kasol/Malana and top things to do around this stunning hill-station of Himalayan State of India

Main places to see & Top things to do around Dalhousie : Stunning Hill Station in Himalayan State of India