How to Export Photographs for publishing on Websites or your Blogs || Save for Web in Adobe Photoshop Elements
Most of the folks prefer to share on Websites or Blogs as it's one of the best ways of presenting your serious work. in Adobe Photoshop Elements, there are different ways of saving photographs in different formats and there are some cool options to process multiple in one go. Today we shall discuss a way of saving files specifically for Web and reducing the risk of infringing your Copyrights.
Let's go step by step and understand the process of saving your Photographs or creations for your website or Blog.
1. When you done with editing, just go to File Menu of Editor in Adobe Photoshop Elements.
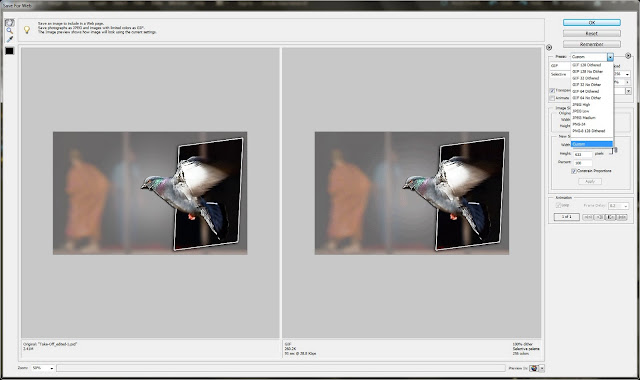
2. Select 'Save for Web' option in File Menu. On selecting this option your photograph will be opened in dialog shown above which is known as Save of Web window in Adobe Photoshop Elements.
3. In this dialog, you get different options to reduce size of your photograph to better fit for your blog or website. There are various parameters on basis of which size of a file can be reduced -
a. File Format, because file format signifies the level of compression for a particular photograph.
b. Color depth - As you reduce the value from 256 you will see decrease in file size which is shown just below the final photograph on right side.
c. New Width and Height will of-course reduce the size of your Photograph drastically.
Overall this dialog provides lot of details about your Photograph and at the same time provides instant impact of any change you do for saving as new file. If you have some transparent areas in the photograph save the file in PNG so that effect is taken care on your HTML Website or Blog. In same way, animations can be saved in GIF format.
Please feel free to ask more questions on this through comments.


.jpg)
Comments